Maintaining an up-to-date WordPress blog is a must for every blogger. By consistently using the most recent version of WordPress, you can rest assured that your blog’s plugins will continue to function normally, that you’ll have access to all the newest features, and, most importantly, that it will be secure from any unauthorized access.
Fortunately, updating your WordPress installation is as simple as clicking a button. You can use the dashboard’s automated upgrading function, upload all files manually, and if that doesn’t work, employ a single straightforward method to repair any faulty plugins.
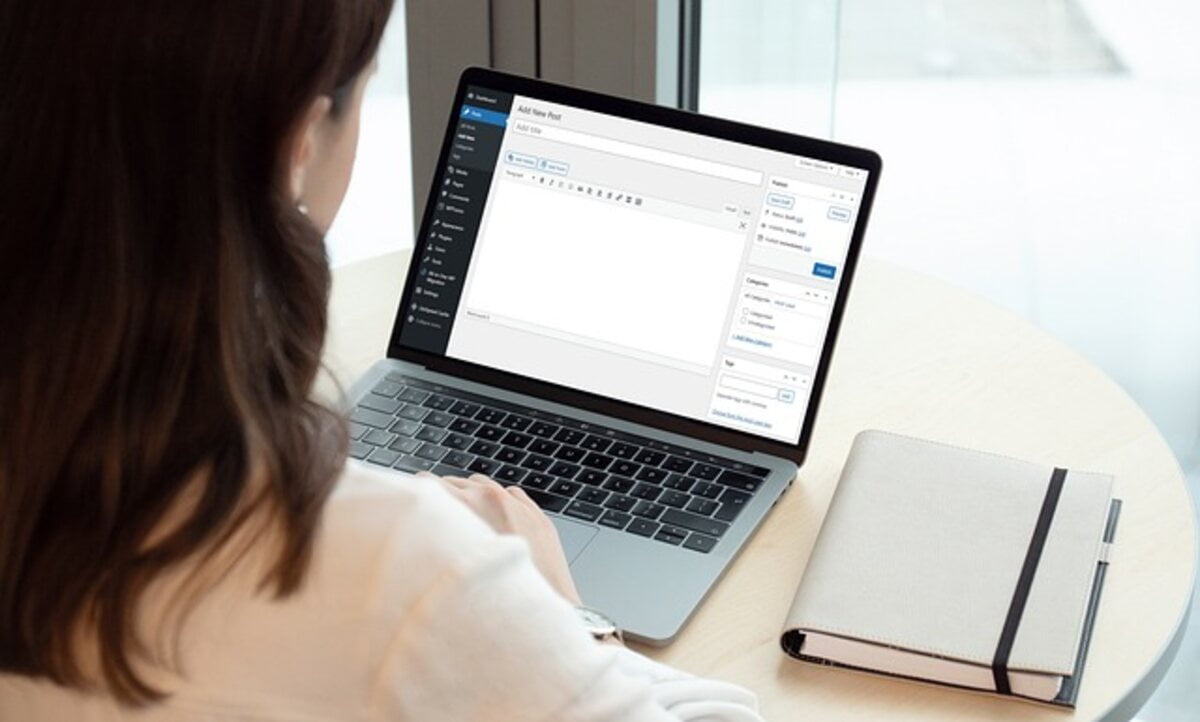
Going to your dashboard and looking for a section labeled updates (often found in the upper left corner) is the first step towards updating WordPress. If you visit the updates page and click the button, the most recent version of WordPress will be downloaded, unzipped, and installed in the directory where you keep your blog.
Take a copy of your blog just in case something goes wrong, but after that, you can upgrade to the latest version of WordPress without touching your FTP or database files.
Even if you’re using an older version of WordPress or if the automatic update functionality isn’t functioning correctly on your site, the fix is straightforward. All you have to do is upload the updated WordPress files, and WordPress will automatically update itself. If it notices that you have updated files but an out-of-date database, it will attempt to update it automatically.
Simply navigate to WordPress.org/download, and you will see a large blue download button that, when clicked, will cause a zip file containing the most recent version of WordPress to begin downloading to your computer. Once the zip file is downloaded, you can open it in your archive program or extract its contents to your desktop. The next step is to fire up your FTP clients and upload the files to the new location of your WordPress blog. To ensure that any existing files are deleted, we will overwrite them.
Related Posts
Since these are only the files that make WordPress work, and your actual content is just stored in the database, you have nothing to worry about.
When you are through with the files mentioned above, you can load your blog to see whether an update is available for WordPress. With the click of a button, your database will be up to date, and you will be running the most recent version of WordPress.
Keep track of the name of the faulty plugin in case it crashes your site or causes additional problems to appear after an upgrade of this type. Take note of the plugin’s name, such as “All-in-One SEO,” and then locate it in your FTP client’s WP-Content folder; inside that folder’s plugins folder, you’ll discover the offending folder and delete it.
WordPress should now load normally, and the plugin can be reinstated in its previous location; this concludes the upgrading process. Check the dashboard’s update section for a one-click update; if it doesn’t work, head over to WordPress.org/download, download the zip file, and upload the contents. Reloading WordPress should fix any issues caused by faulty plugins, but if they persist, delete or rename the wp-content/plugins folder and try again.
You should use a program to back up your WordPress blog if you need to.
EzineArticles.com/6909727 is where the article was sourced from.
Read also: Buying a Portable Computer: Laptops vs. Notebooks.